Please follow the steps below to prepare your files for printing:
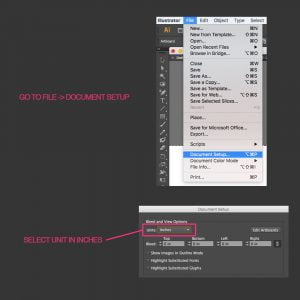
1 – Set the correct print size. Make sure you set the width to 44″ so you don’t have to trim your print manually. It’ll also be faster and cheaper to print.

2 – Flatten the layers

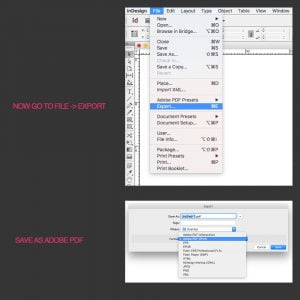
3- “Save As” a new copy as Photoshop PDF

– Make sure you uncheck all these boxes otherwise your files will be very heavy unnecessarily and cause issues in the printing process.

4- Open your PDF in Acrobat and double-check everything looks good.
5- Upload your file in the link below and place your order online. Please note your prints will not need trimming if the width is exactly 44″. Otherwise, you will have to manually trim your boards.
https://viviaprint.com/product/local-quick-matte-photo-printing/
You can enter your promo code on the checkout page to get your special class discount.
We will send you an email as soon as your prints are ready for pickup.
Good luck.