Please follow all the steps thoroughly. The last step is the most import part which can cause issues with file uploads if missed.
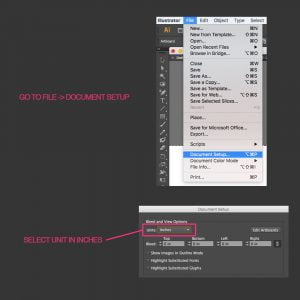
1 – Set your desired print size


2 – Set the color mode and color profile:
From the Image menu, select Mode -> RGB colors

Why not CMYK?
Modern digital printers such as the Epson SureColor Series, use up to 10 different colors to produce the widest color gamut, capturing the most intricate details of any form of artwork. We send RGB files to the printer driver and let it do its magic instead of converting them to CMYK and losing all the vibrant colors before the printing begins.
Then from the Edit menu, select “Convert to Profile”

Set the destination profile to Adobe RGB 1998. Please note, that selecting any other color profiles could result in a color shift as we primarily use Adobe RGB 1998 in our workflow.

After you click OK, check the colors of your file and apply adjustments if needed.
Alternatively, if you want to only change the assigned color profile without changing color values, you can use the “Assign Profile” option from the Edit menu.

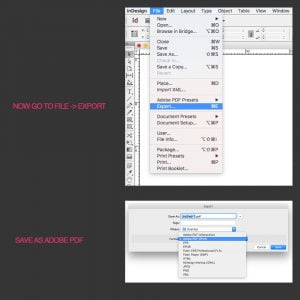
3- Save the file as PDF

Select the High Quality Print preset

THE MOST IMPORTANT STEP:
Uncheck the option “Preserve Photoshop Editing Capabilities”.

We highly recommend ordering a small test print on the same paper your file is going to be printed on. This will ensure the colors are to your liking and you will have a chance to adjust the colors before placing your order.
If you have any questions, feel free to reach out to our team.