Learn how to connect your Shopify store to Vivia Print and have your print orders fulfilled.
On this page, we will talk about:
- Connecting your Shopify store to Vivia Print
- Syncing your products
- Setting Shopify shipping rates
- Sending fulfillment requests
- Paying for your orders
- Our current shipping rates
Connecting your Shopify store to Vivia Print
1- Login to your Shopify store
2- Install our Shopify App from here https://apps.shopify.com/viviaprint
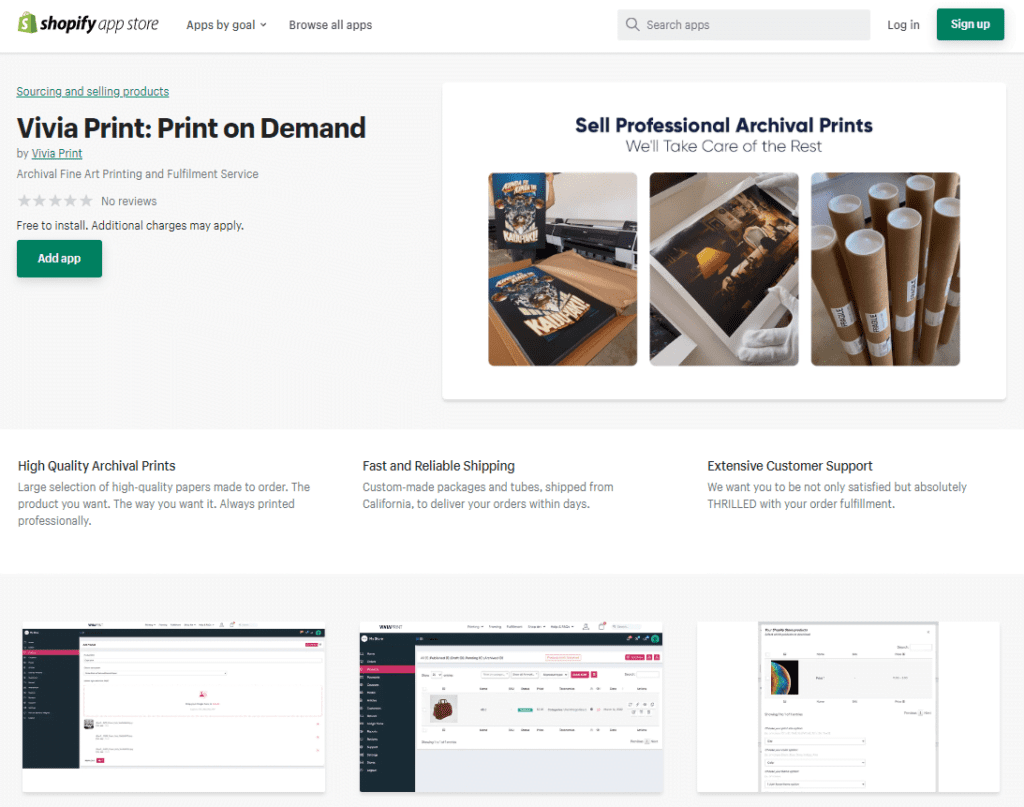
3- Follow the steps and create a vendor account on Vivia Print

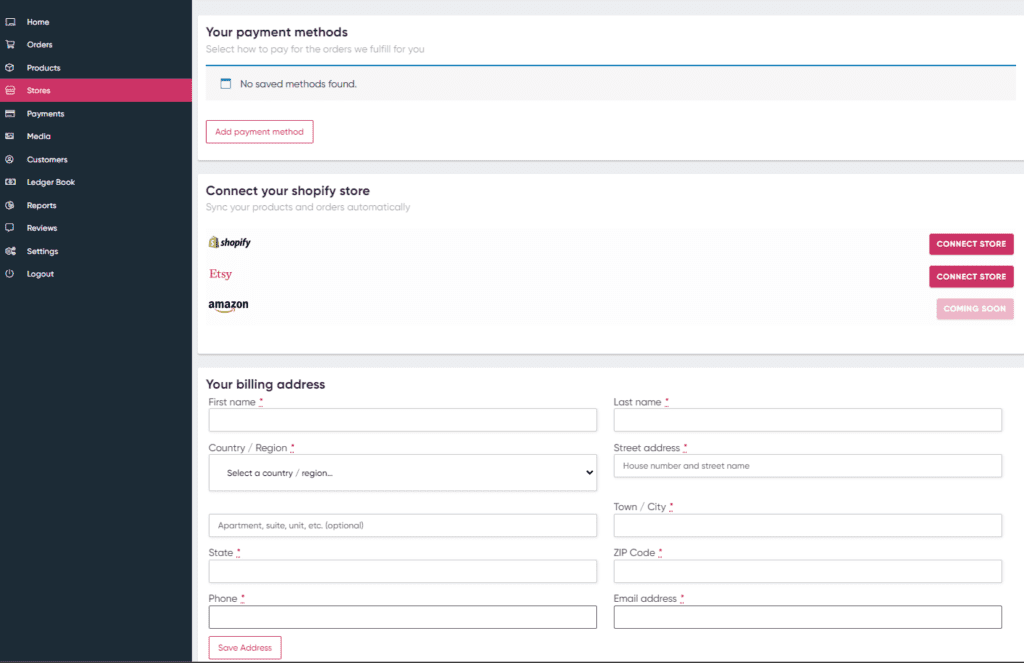
4- Go to the Stores menu and add a payment method and billing address
Syncing your products
There are two ways to sync your products to Vivia Print. If you have an established Shopify store, you can import your existing products to Vivia Print and configure them to be used for fulfillment.
Alternatively, if you are starting your store and have not created any products in your Shopify store yet, we recommend you create your products in Vivia Print first and then export them to your store. This is a faster process and is highly recommended.
Import existing products from Shopify
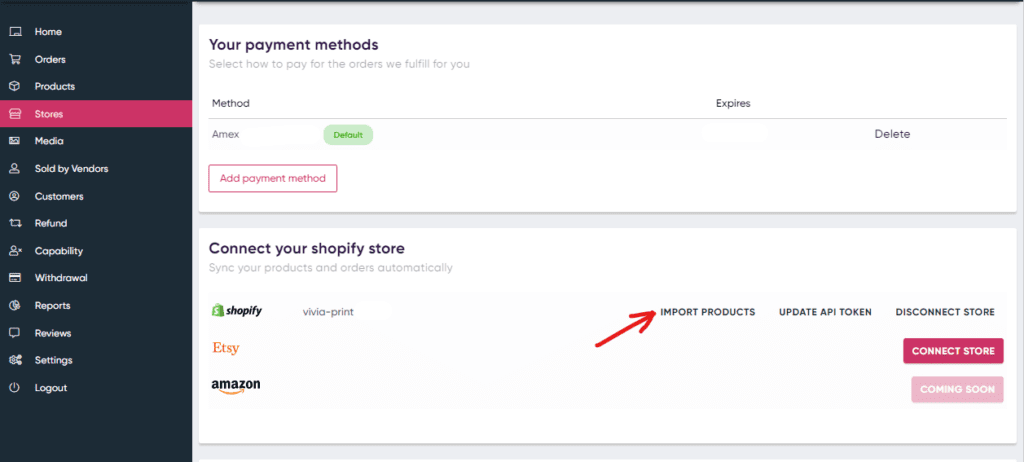
1- Go to the Stores menu and click on “IMPORT PRODUCTS” (this option is only available after you’ve connected your Shopify store and added a payment method).
2- In the popup window, select the print products you would like to import to Vivia Print for fulfillment.
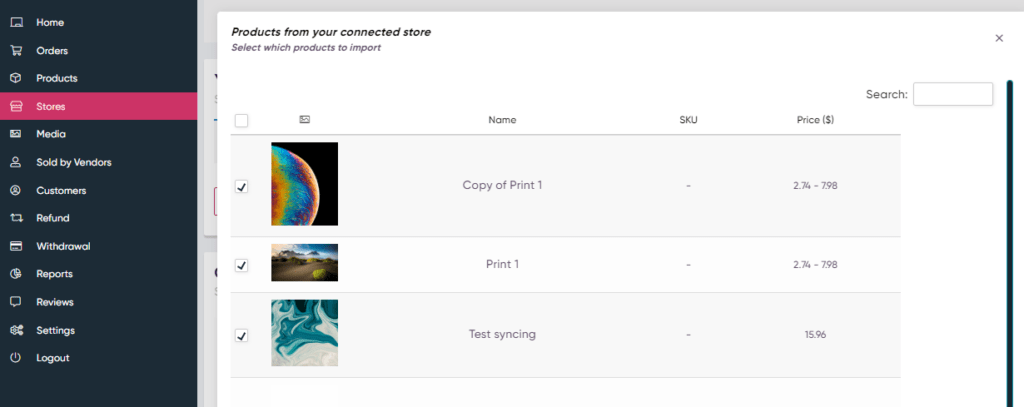
3- *IMPORTANT – Please make sure you select the variation for print size at the bottom of this popup. All print products need to have a “Print Size” variation. Even if you’re selling only one size print, your product still needs to have a single variation for the print size. Not selecting the correct size variation here will complicate your product syncing process further down the road.

4- In the next step, the app will loop through all the products you selected in the previous step one by one for you to configure each one. All you need to do is:
- Select the paper type you’d like your artwork to be printed on (this affects the cost of printing, you’ll see the prices in the next step)
- Upload all the print-ready files for each size variation. The native dimensions (AKA Image Size, Canvas Size, Print Size) have to match the variation size. If these sizes do not seem correct, you need to format your file to the correct size for printing

In the next step, you can see how much each print variation would cost you and how much you would profit. *This price does not include shipping. The shipping cost is calculated per order later when you send fulfillment requests. We will explain this later in this guide.

5- Repeat this process for the rest of the products you would like to import.
Export products to Shopify
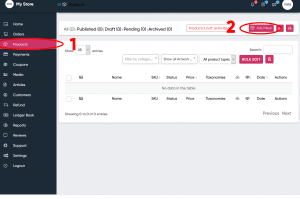
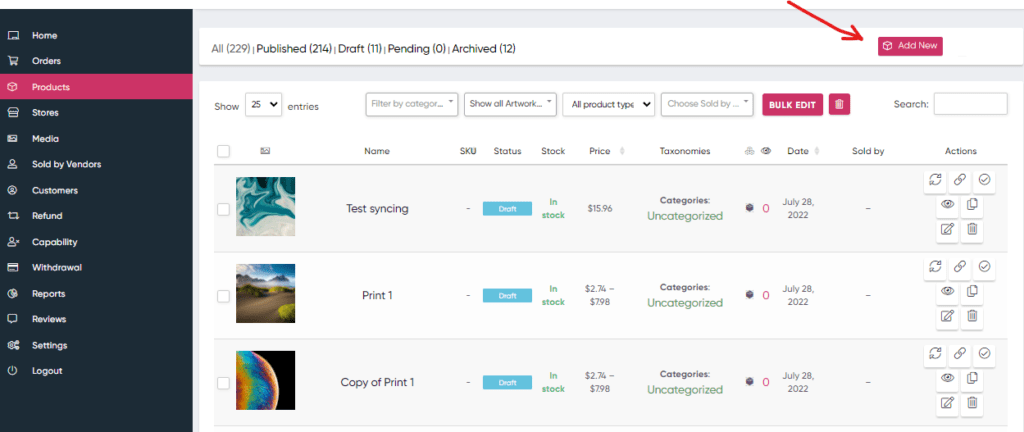
1- Go to the Products menu and click on “Add New”
2- Upload all your print-ready files for each size variation
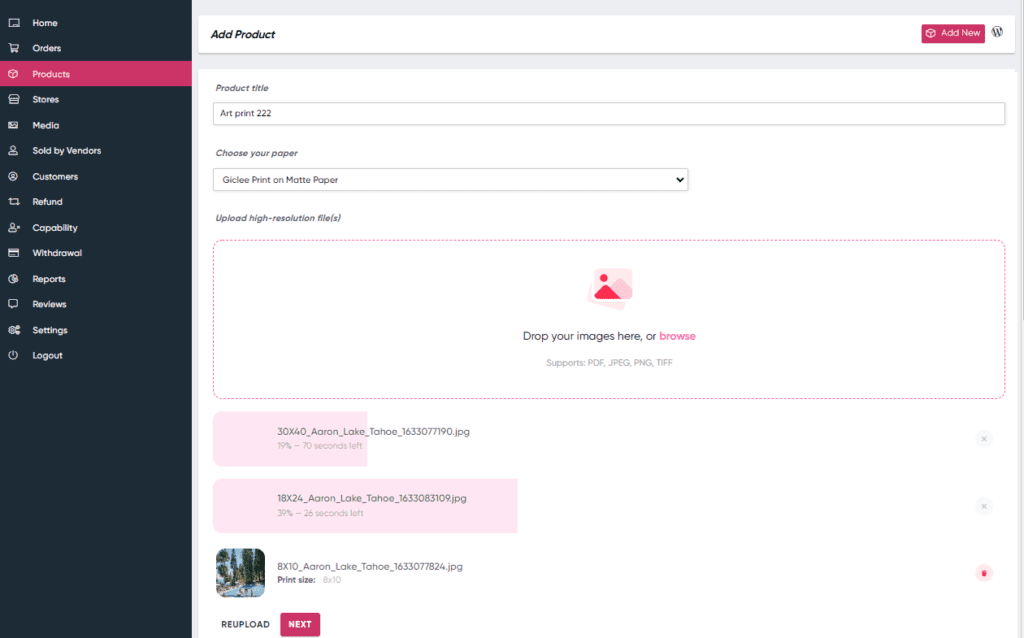
* The app will automatically recognize the native print size of each file. If the print size shown is not correct, you need to format the files correctly and try again.
3- Set your prices for each print size. Please make sure your profit margins are high enough to cover the cost of shipping.
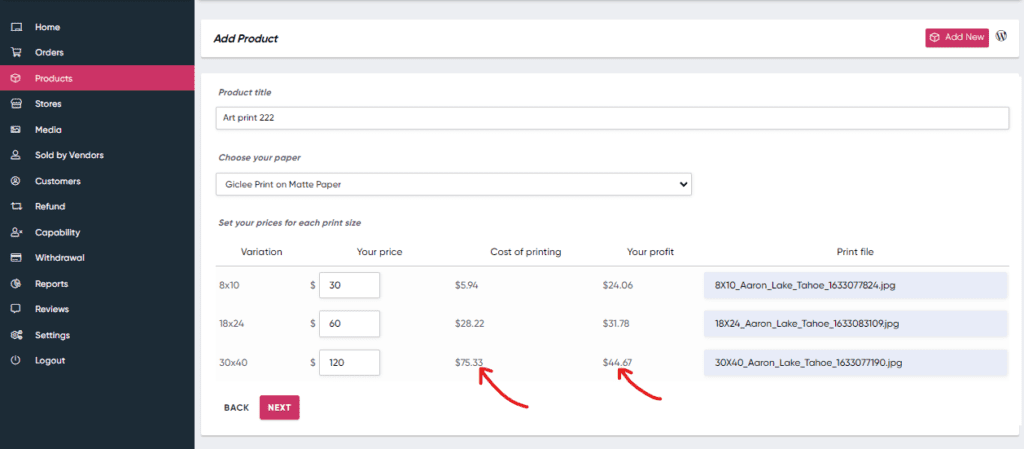
4- Add product details to the next step and save the product. This might take a few minutes based on the size variations and files you’ve uploaded.
5- Once the product is saved, scroll down to the bottom of the page and you will see all your size variations. You can Export/Sync this product to Shopify from here. You should be able to see this product in your Shopify store dashboard shortly after.

Setting Shopify shipping rates
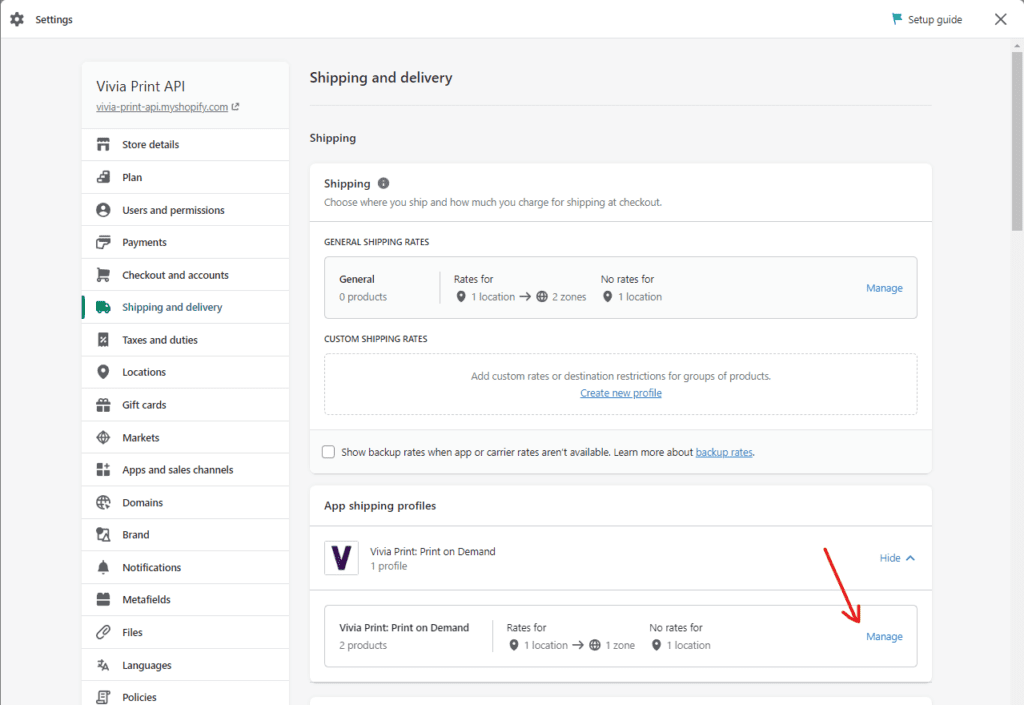
When you first install the Vivia Print app, a new shipping profile is created for your store. However, you need to adjust the shipping rates for products that are going to be fulfilled by Vivia Print. The default setting is set to “Free Shipping”. You can access these settings from your store settings page.
Sending fulfillment requests
By default, Shopify stores are set to handle fulfillment requests manually. This means your orders will not be sent to us automatically unless you change the settings in your store settings.
This is actually a great feature as it enables you to edit or cancel the orders in case your customers change their minds or need to edit their orders before they are processed.
Once you are sure certain orders are ready to be shipped out, you can select them in your Shopify orders dashboard and click “Mark as fulfilled”. This will send us all the selected orders for fulfillment.
*Please note, that once we process your orders, it’s not possible to cancel and refund the order.
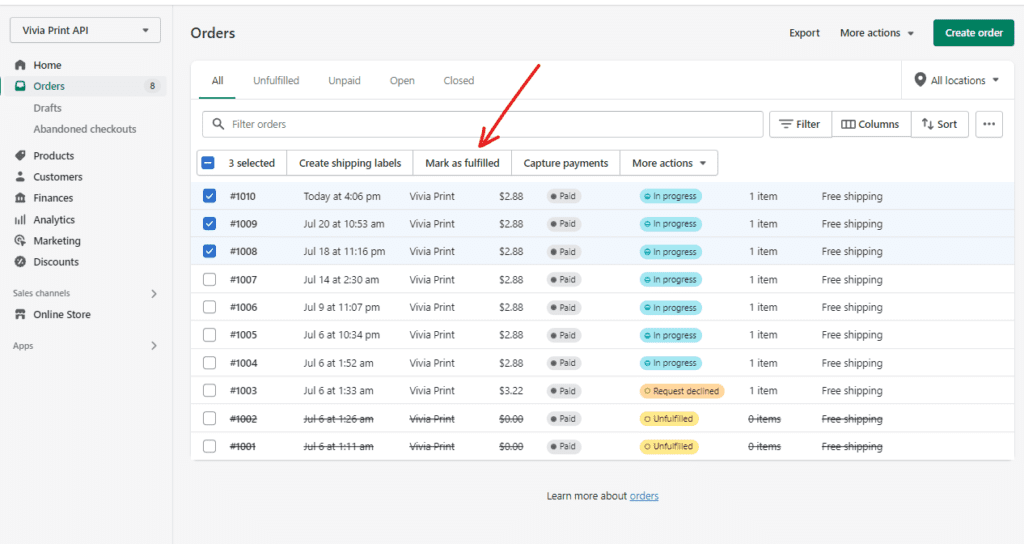
Alternatively, you can request fulfillment for orders individually by opening the order and clicking on the “Request fulfillment” button.

You can check the order notes to see if your order fulfillment request has been accepted. If there are any issues with your payment or print files, your request may be declined and the error will be shown here.

Paying for your orders
Credit Card
By default, your credit card will be charged separately for every single order you send. This works ok if your order volume is low. But if you get multiple orders on a daily basis, Please consider using our wallet feature.
Vivia Print Wallet
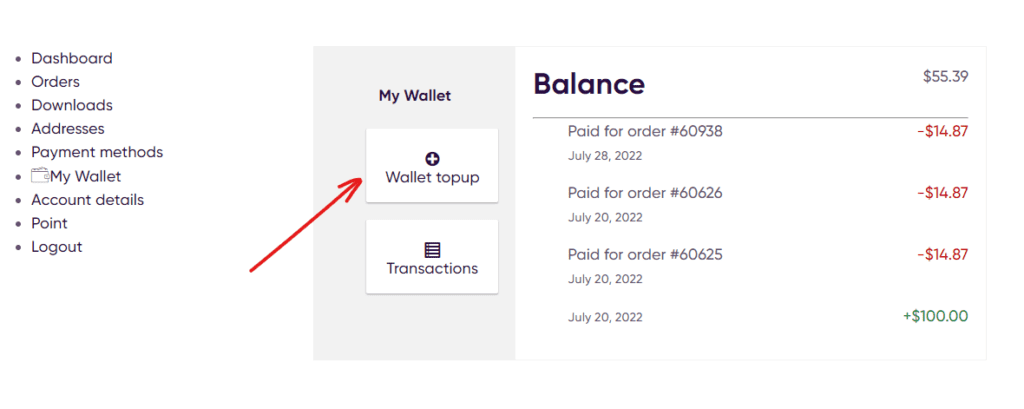
The wallet allows you to add credit to your account and use it for your order fulfillment requests. Your order cost will be deducted from your wallet until the balance is zero and your credit card will be charged for the remaining balance.
Using the wallet when you are sending fulfillment requests for multiple orders in a short period of time eliminates a lot of unnecessary transactions on your credit card and helps us save money on transaction fees. You can access it here https://viviaprint.com/my-account/woo-wallet/
Shipping
International and Domestic Shipping
UPS and USPS domestic ground shipping usually take between 3 to 7 days. Shipping rates are calculated based on package size, weight, and delivery address. By default, we use the service with the lowest rate.
If you need expedited shipping, please send us an email request and we’ll invoice you for the difference.


