Adobe Illustrator — How to Prepare Your File for Printing
Please follow all the steps thoroughly. The last step is critical—missing it can cause upload issues.
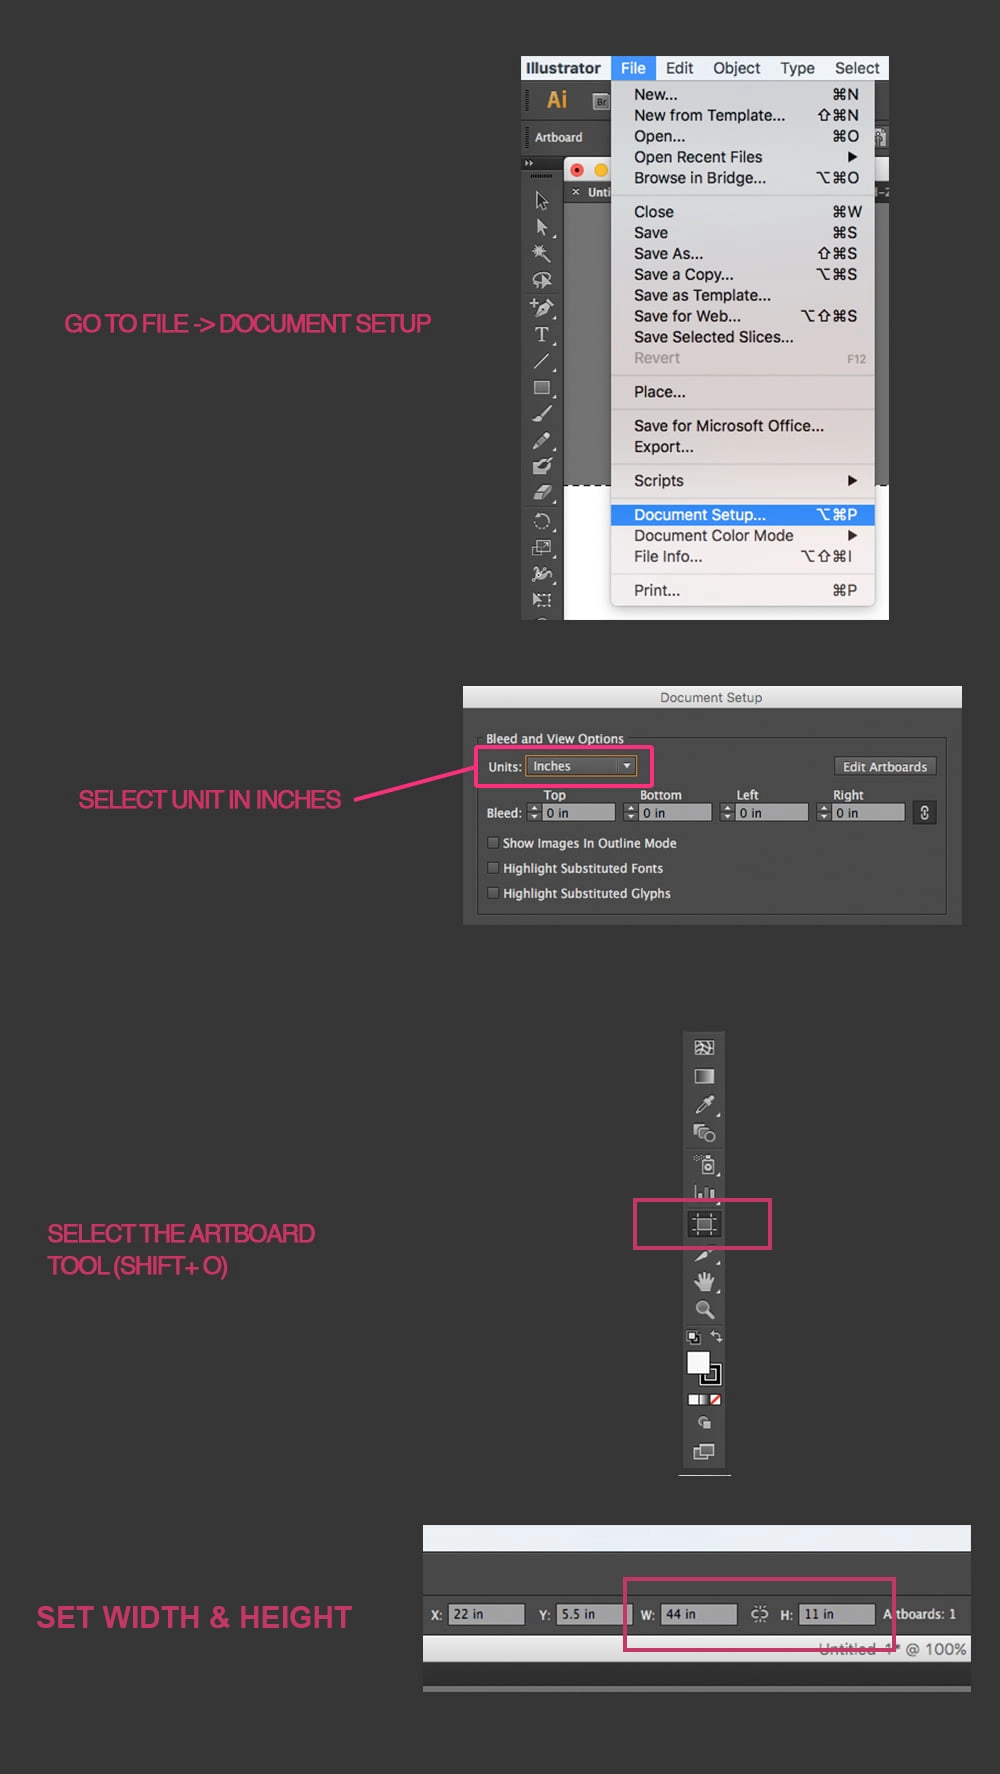
1 – Set your desired print size
2 – Set the color mode and color profile
- From the File menu, select Document Color Mode → RGB Color.
- From the Edit menu, choose Assign Profile, select Adobe RGB (1998), then click OK.
- Ensure all text is converted to outlines: Select all text objects and go to Type → Create Outlines.
Why RGB instead of CMYK? Our printing process uses RGB color profiles for better color accuracy and consistency across different print media.
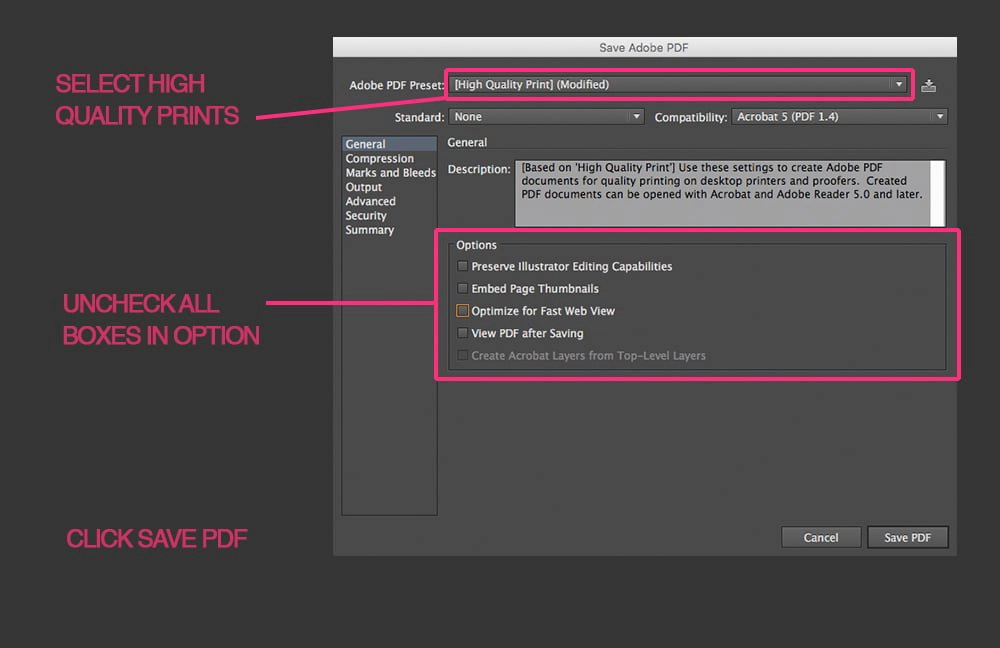
3 – Export and save

Ready to upload! Your PDF file is now properly formatted for high-quality printing. Make sure to save a copy of your original AI file for future edits.