Check Our Current Extended Store Hours Here. 6 AM to 8 PM (Weekend Excluded)

Prepare Your File in Photoshop

August 11, 2025
4 min read

1 – Set your desired print size

Photoshop: Set canvas size to desired print size
Set the document to your final print dimensions at 300 ppi (or your target resolution).

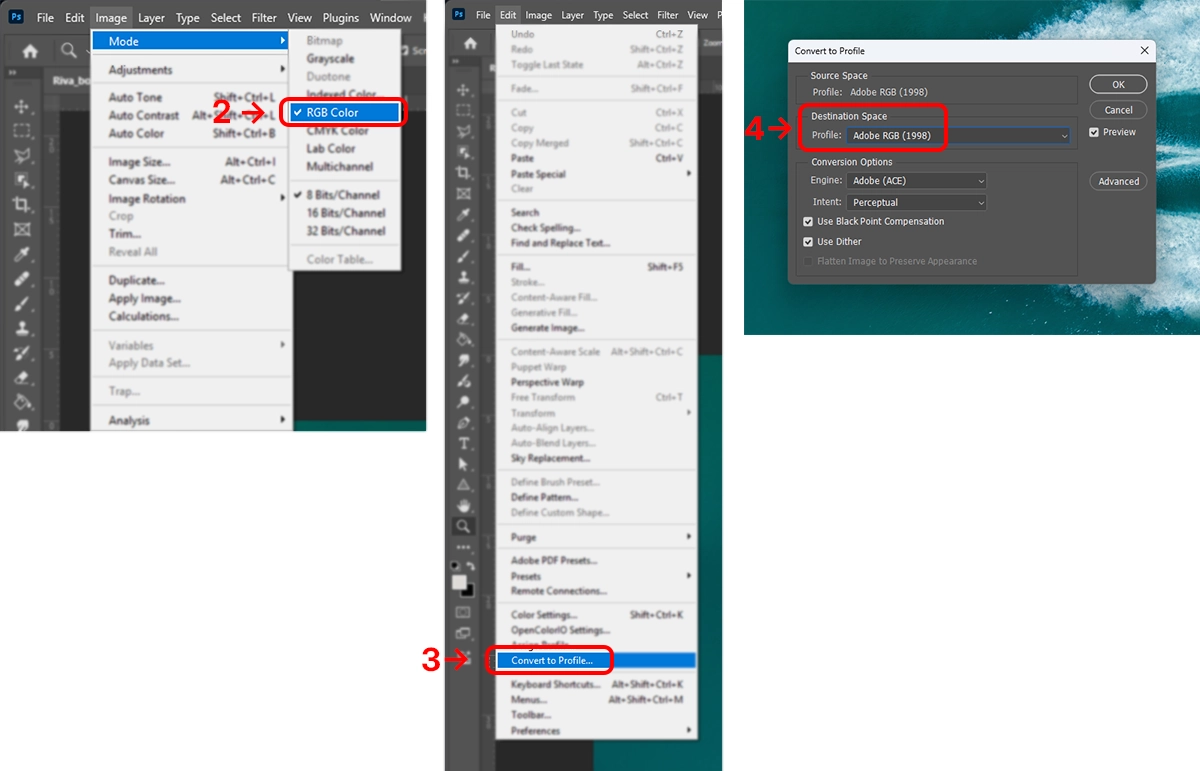
2 – Set the color mode and color profile

  1. From the Image menu, select Mode → RGB Color.
  2. From the Edit menu, choose Convert to Profile…, set Destination Space to Adobe RGB (1998), then click OK.
Photoshop: Convert to Profile dialog
Use Convert to Profile to move the document into Adobe RGB (1998).

Why not CMYK? Modern fine-art printers (e.g., Epson SureColor series) use up to 10 inks to produce a very wide gamut. We keep files in RGB and let the printer driver handle conversion so you don’t lose vibrancy before printing.

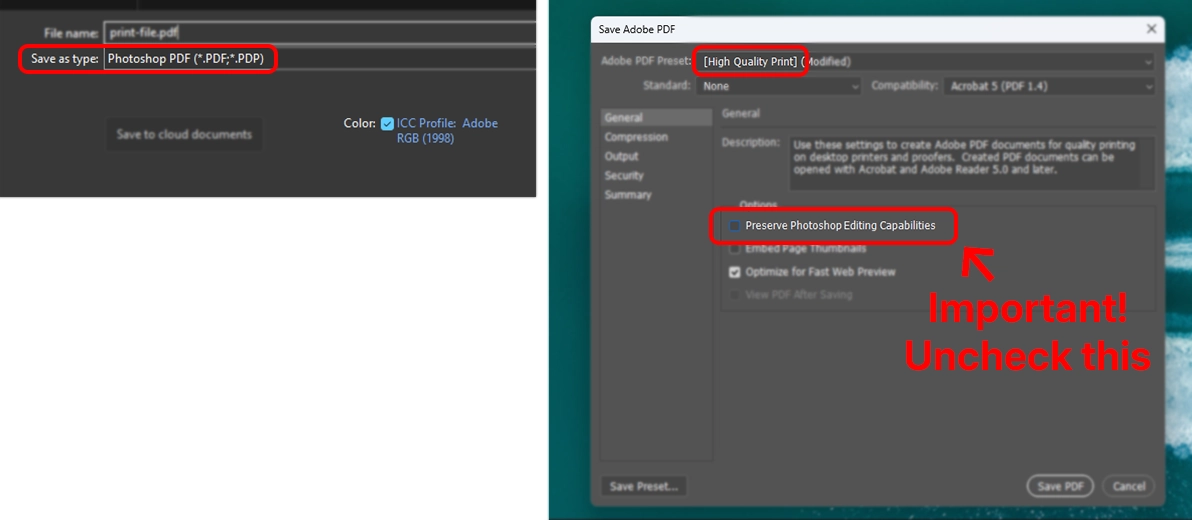
3 – Save the file as PDF

Photoshop: Save as Adobe PDF with High Quality Print preset
Choose Save AsPhotoshop PDF, then select the High Quality Print preset.
Most important: Uncheck Preserve Photoshop Editing Capabilities before saving.

Recommendation: Order a small test print on the same paper you’ll use for the final piece. It’s the best way to confirm color before placing your full order. If you have questions, our team is happy to help.

Related Posts

File Prep Guides
August 11, 2025

Prepare Your File in Illustrator

Adobe Illustrator — How to Prepare Your File for Printing Please follow all the steps thoroughly. The last st...

Read More